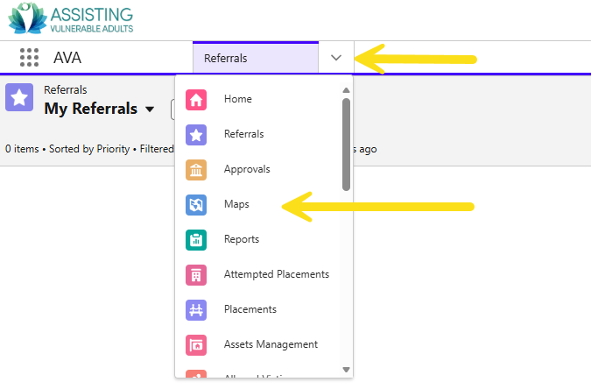
- Log in to Salesforce. Click the arrow then select “Maps”
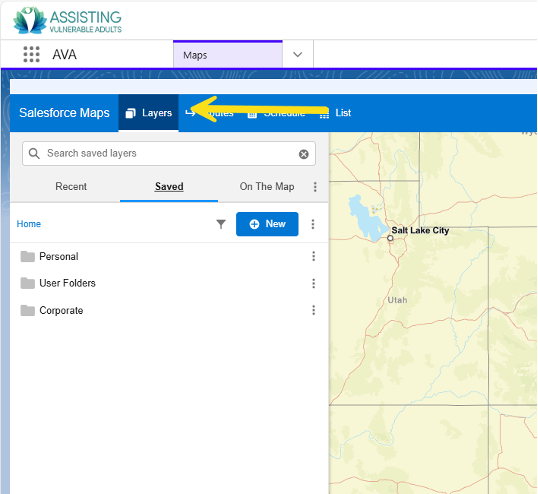
- Click the “Layers” tab
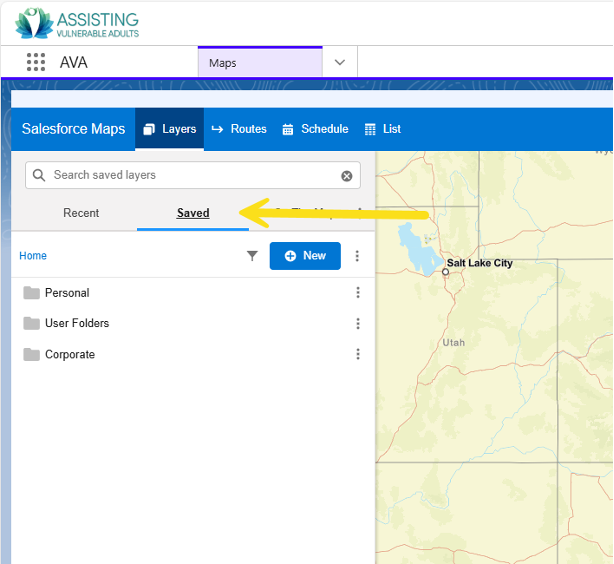
- Click the “Saved” tab
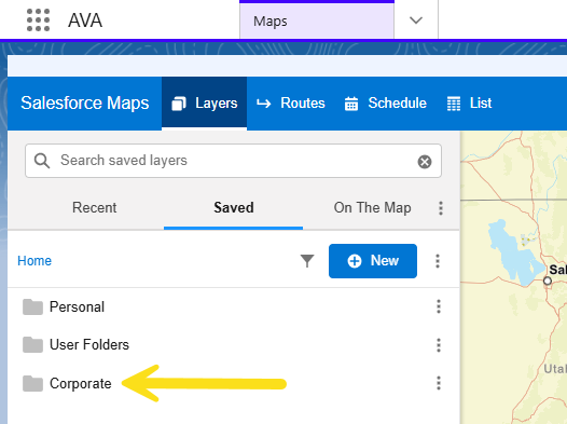
- Click the “Corporate” folder
- Click “APS”
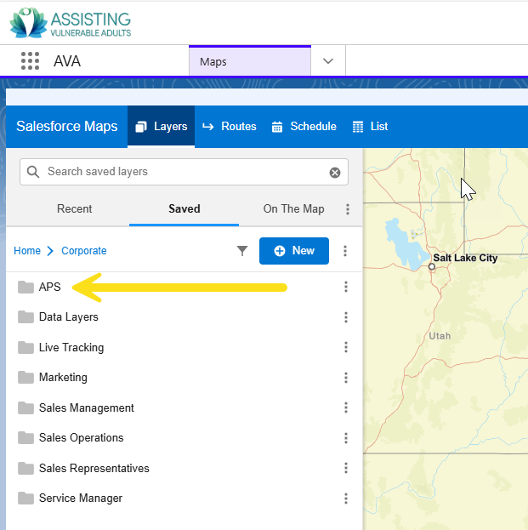
a. Layers for every team are shown.
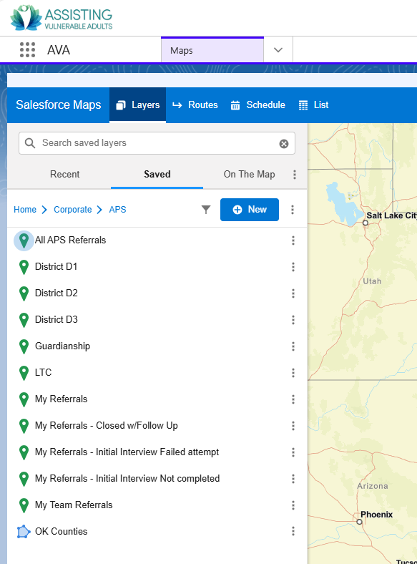
b. Select a layer to add to the map and zoom in to see individual pins in the area to be visited. The pins from the selected layers are displayed on the map.
*Note: you can add more than one layer to the map at a time.
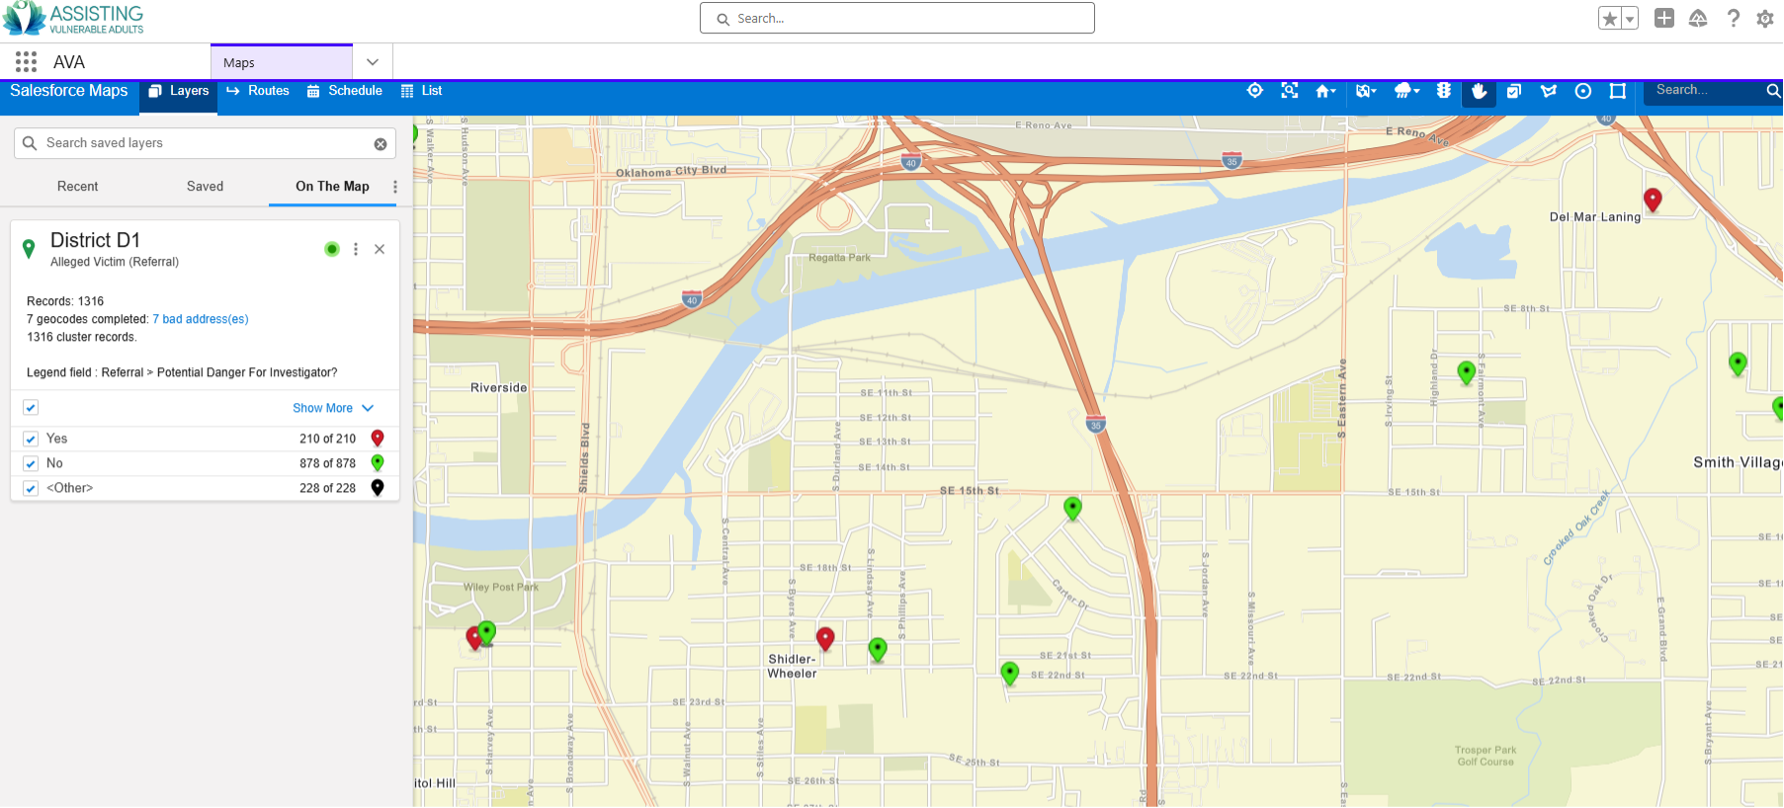
Instructions for adding locations to a route
- Choose one of these options to add multiple locations to the map at once.

The options are:
a. “Draw a Polygon” To use this option, click on the map in the boundary around the pins to be visited. This starts the boundary. Drag to the next point and click to create one side of the boundary. Continue this until all the pins to be visited are inside a completed boundary and double click to complete the shape.
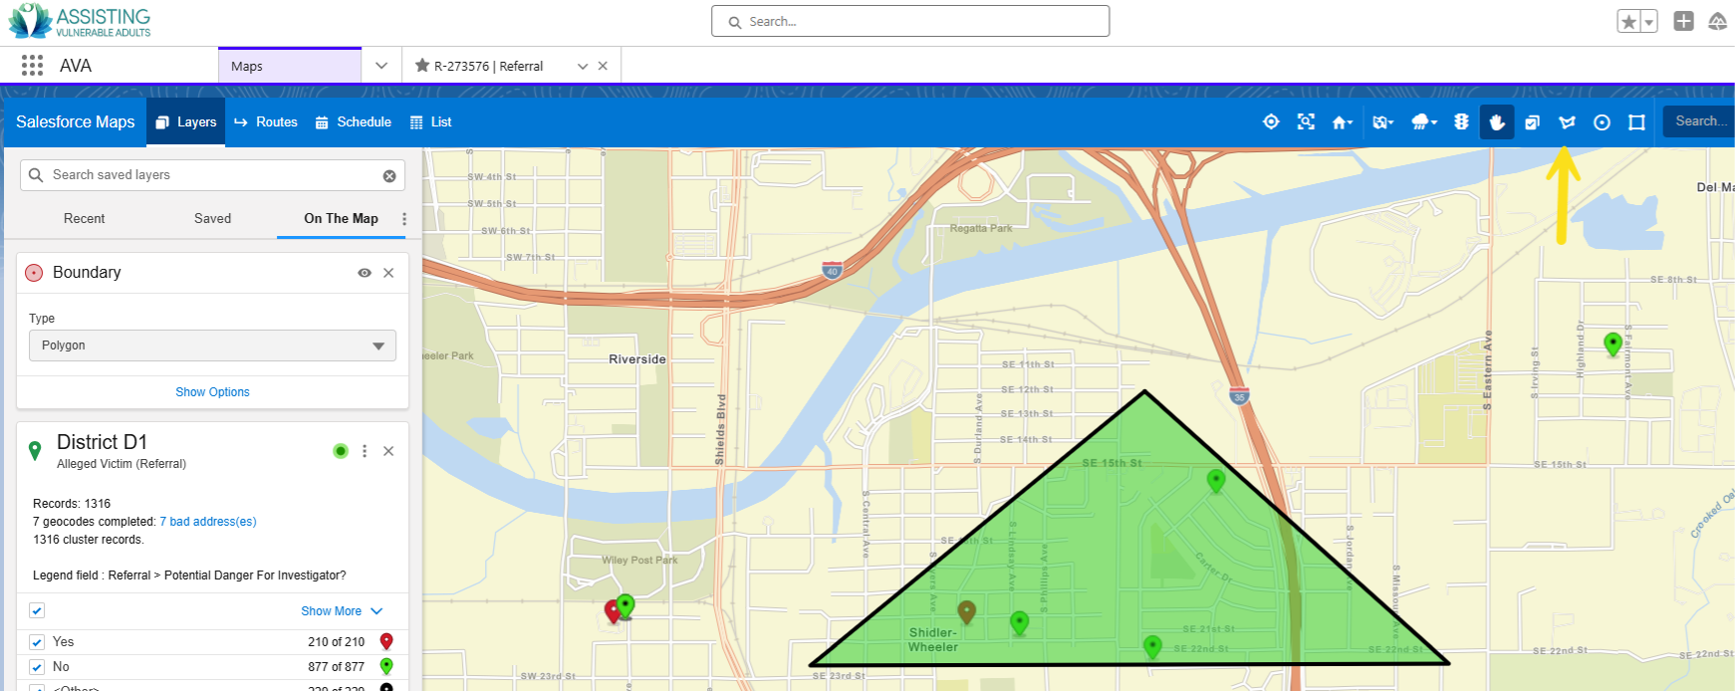
b. “Draw a Circle” To use this option, click on the map in the center of the pins to be visited and drag until all the pins to be visited are inside the completed boundary. Let go of the mouse to stop adjusting the boundary.
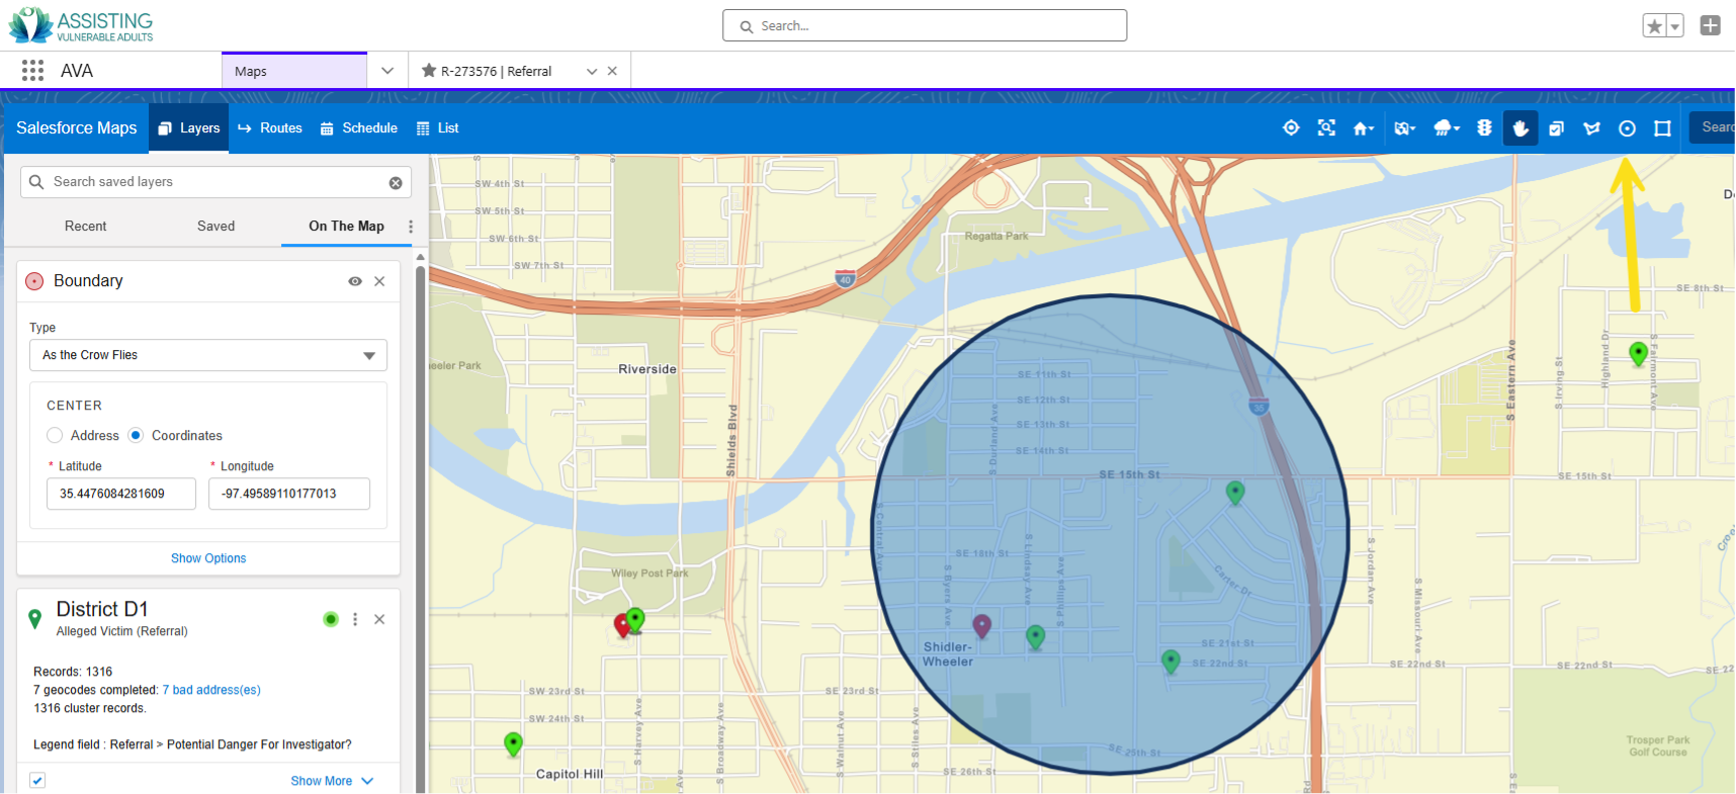
c. “Draw a Rectangle” To use this option, click on the map outside of the pins to be visited and drag until all the pins to be visited are inside the completed boundary. Let go of the mouse to stop adjusting the boundary.
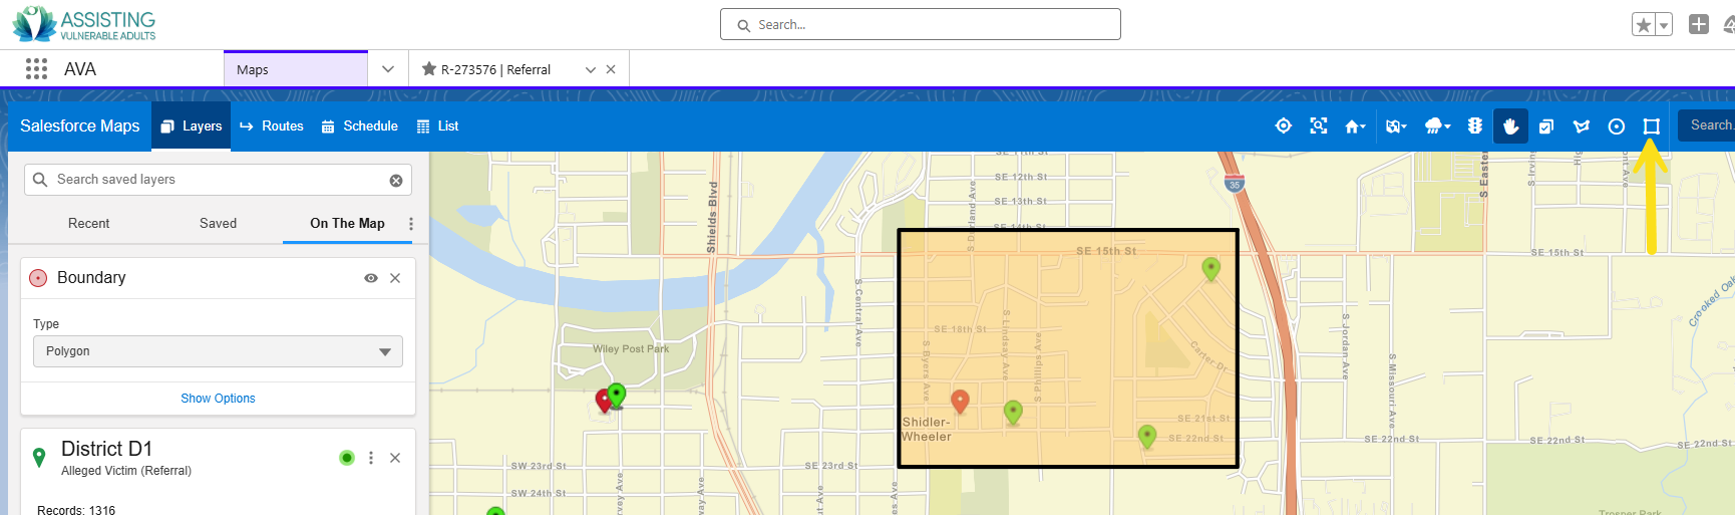
d. To remove the boundary, right click inside the boundary and select “Remove Layer”
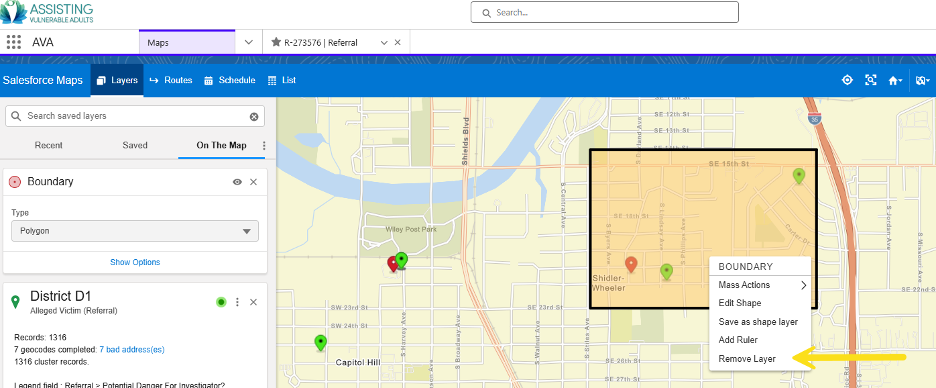
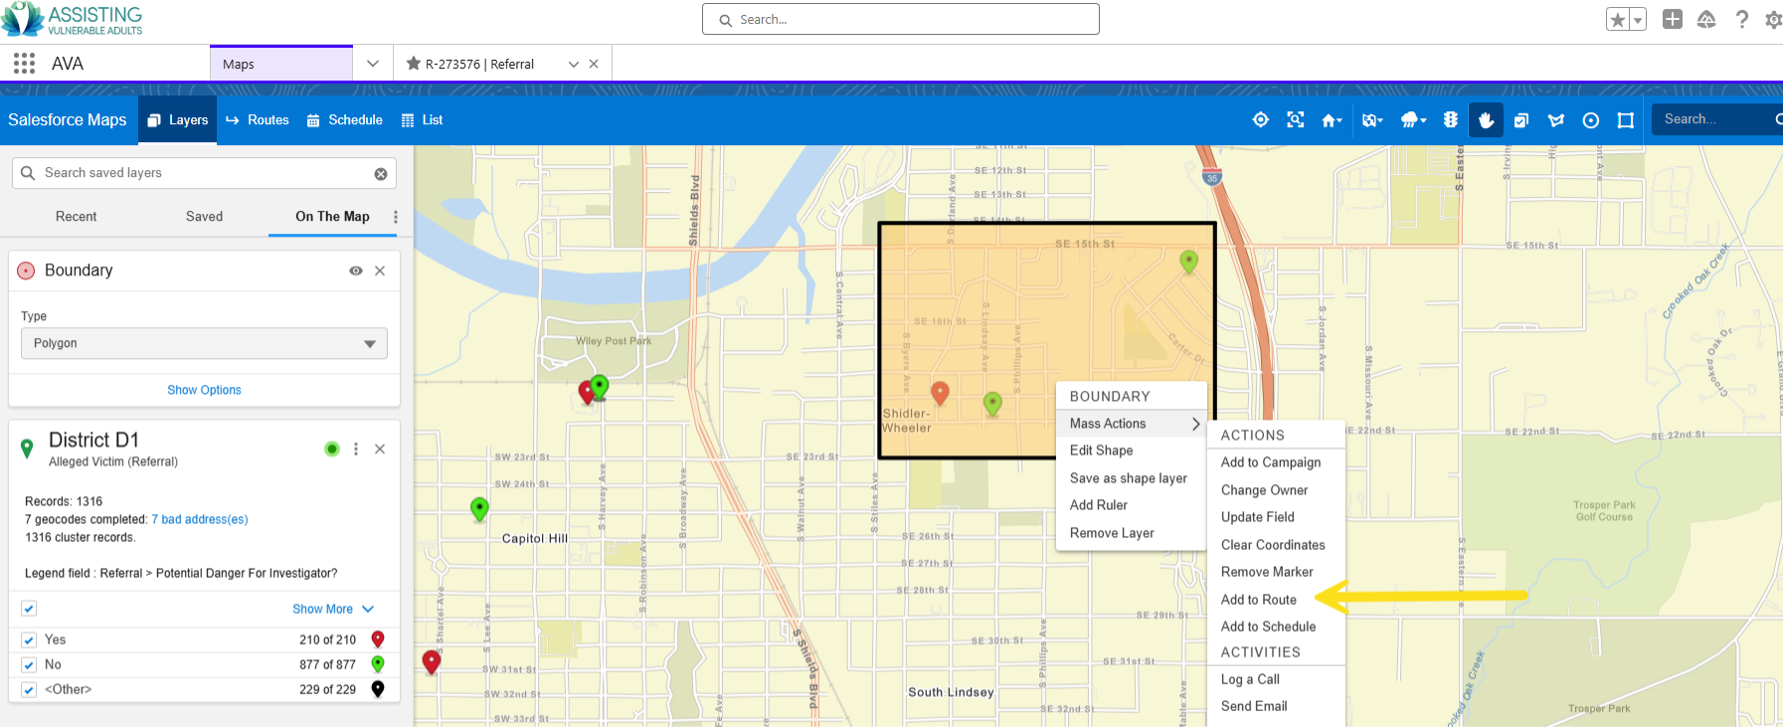
- To add pins to the route, right click inside the boundary and select “Mass Actions”
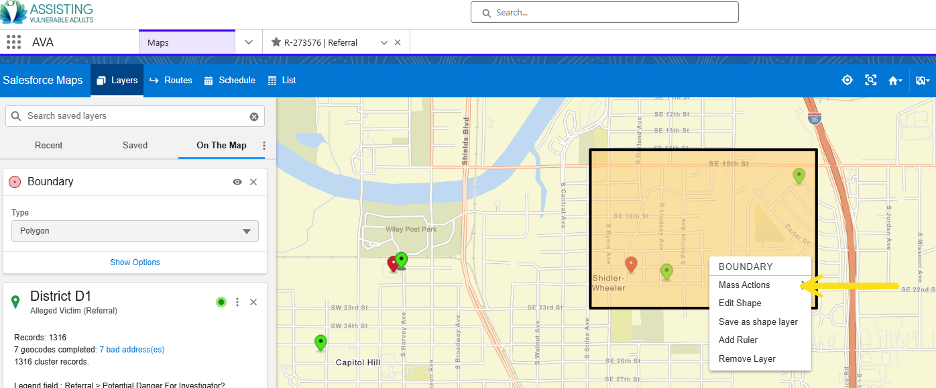
- Click add to route
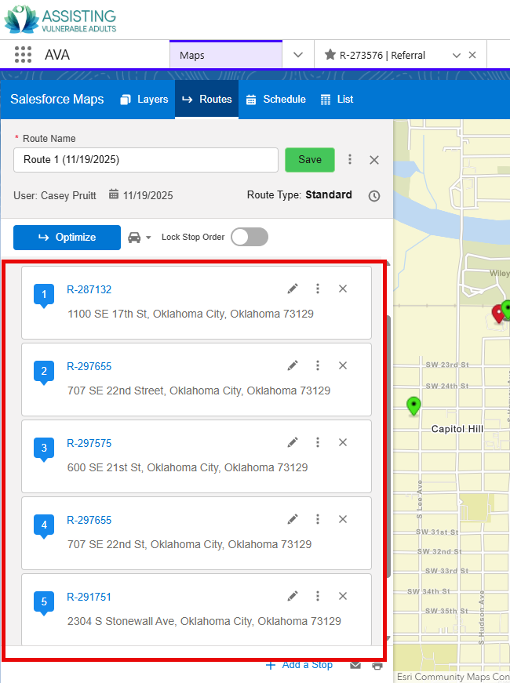
a. All of the locations inside the polygon should now appear to the left panel.
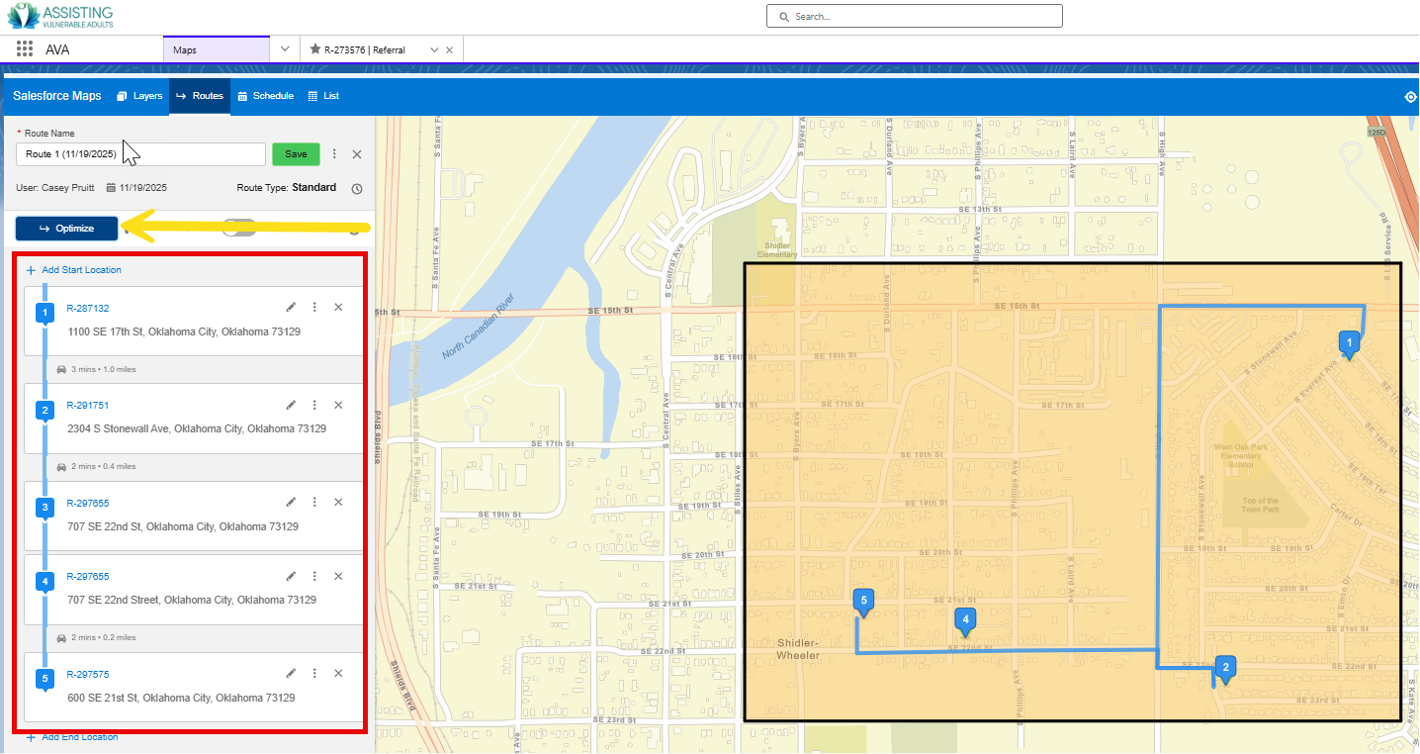
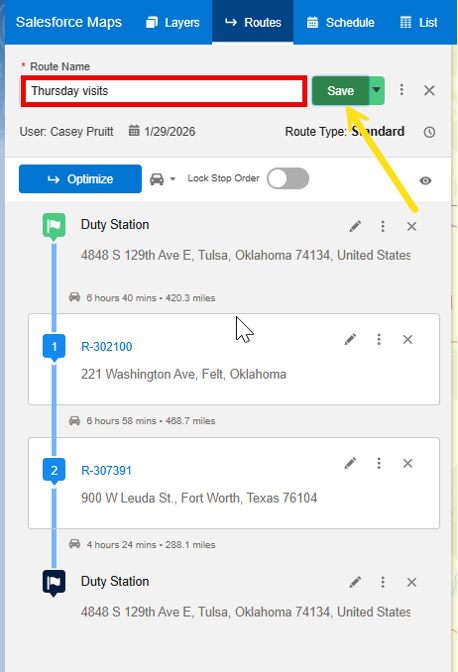
b. Click “Optimize” You should now see all the locations in the most efficient route.
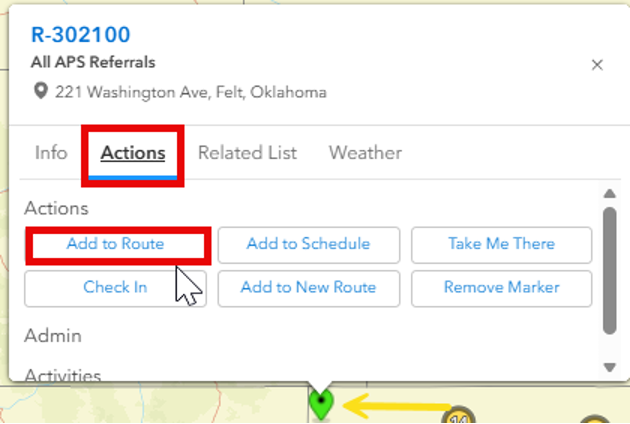
- You can also add individual pins to the route by clicking on the pin, selecting actions, then select add to route.
- Name your route and click “Save”
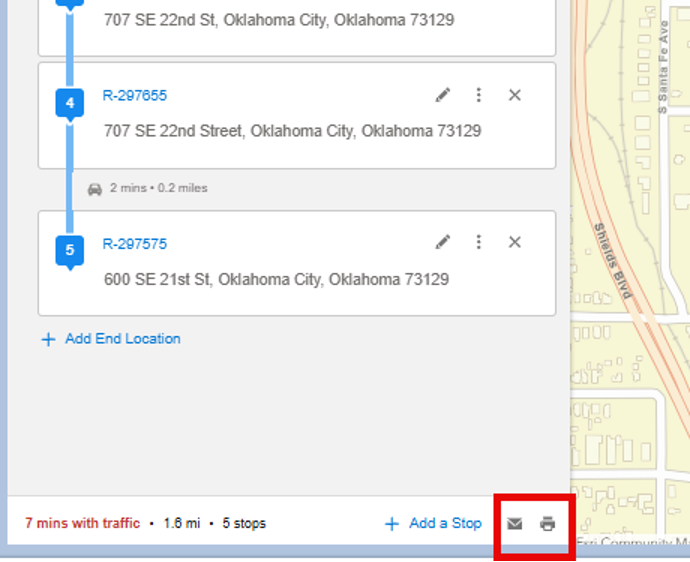
- These instructions can then be emailed or printed or simply type the locations in order as they appear in the mapping system on your mobile device and begin your day of travel in the field.