There are two ways to add files to a referral and multiple ways to view files. This article will show two methods for adding files and the best preferred method for viewing files.
Method #1 for Adding Files

- Navigate to the appropriate referral, then to the
Filestab in the referral. Enter a Document Name. Follow the How to Name Files in AVA guidelines. - Then select
Document Type. - Upload the Document and click
Nextto complete the process.
Method #2 for Adding Files
*Using method #2, up to 10 files can be uploaded at once*
*When using this method, please also follow the How to Name Files in AVA guidelines*
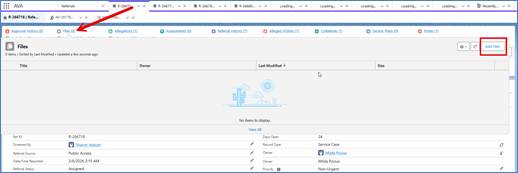
- Navigate to the appropriate referral, then hover over the Files quick link at the top. Click “Add Files” button in top right.
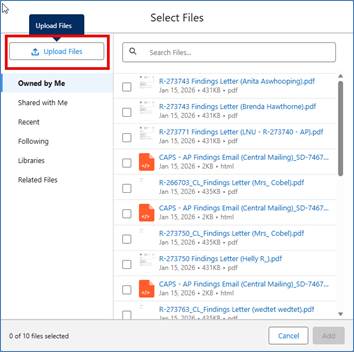
- From the “Select Files” pop up screen, select “Upload Files.”
- Select the file from wherever it is saved on your device then click “Open.”

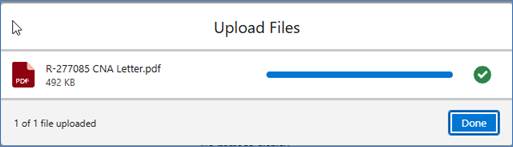
- Once the file is done uploading (green check mark next to blue progress bar), click “Done” to complete the process.
Preferred Method for Viewing Files
- Navigate to the appropriate referral, then to the Files tab in the referral.
- Scroll all the way down to the “Related Files” section. The “Related Files” will show all files uploaded to the referral no matter where the file is stored within the referral, i.e. AV tab, AP tab, Collateral tab, Court Orders tab, Files quick link, etc.

