- From Home, look under My Referrals. Click on the Referral ID of the case in which you want to complete the Service Plan.
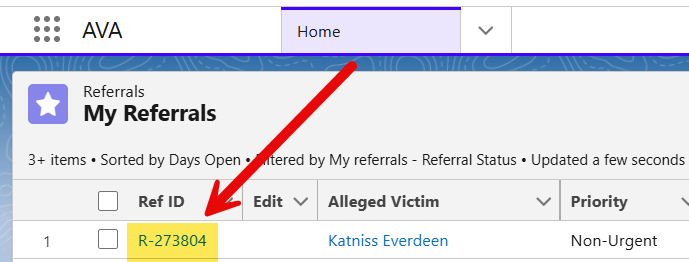
- From the Reports page, click on the Service Plan tab.
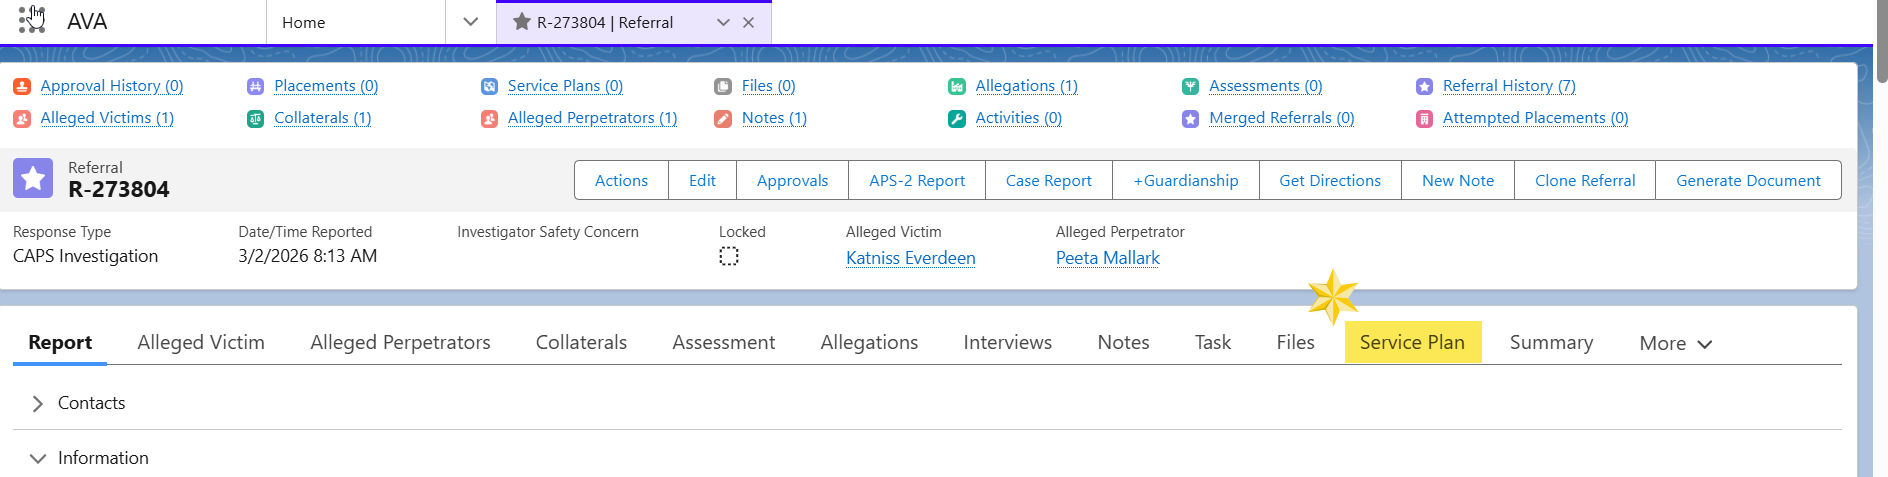
- Keep in mind this first page is the “Cover Page” of the service plan you are completing. If you have more than one AV to complete a service plan for, you will see all the AV names in the Recipient field. Select the appropriate AV name, leave the Status field as “New,” input the Start Date as the date you saw the AV and began offering services, and the End Date can be left blank. If the service plan includes a pending Medicaid application, check the checkbox. The Summary field can be left blank or information can be entered, depending on the preferences of the supervisor. Lastly, click Next.
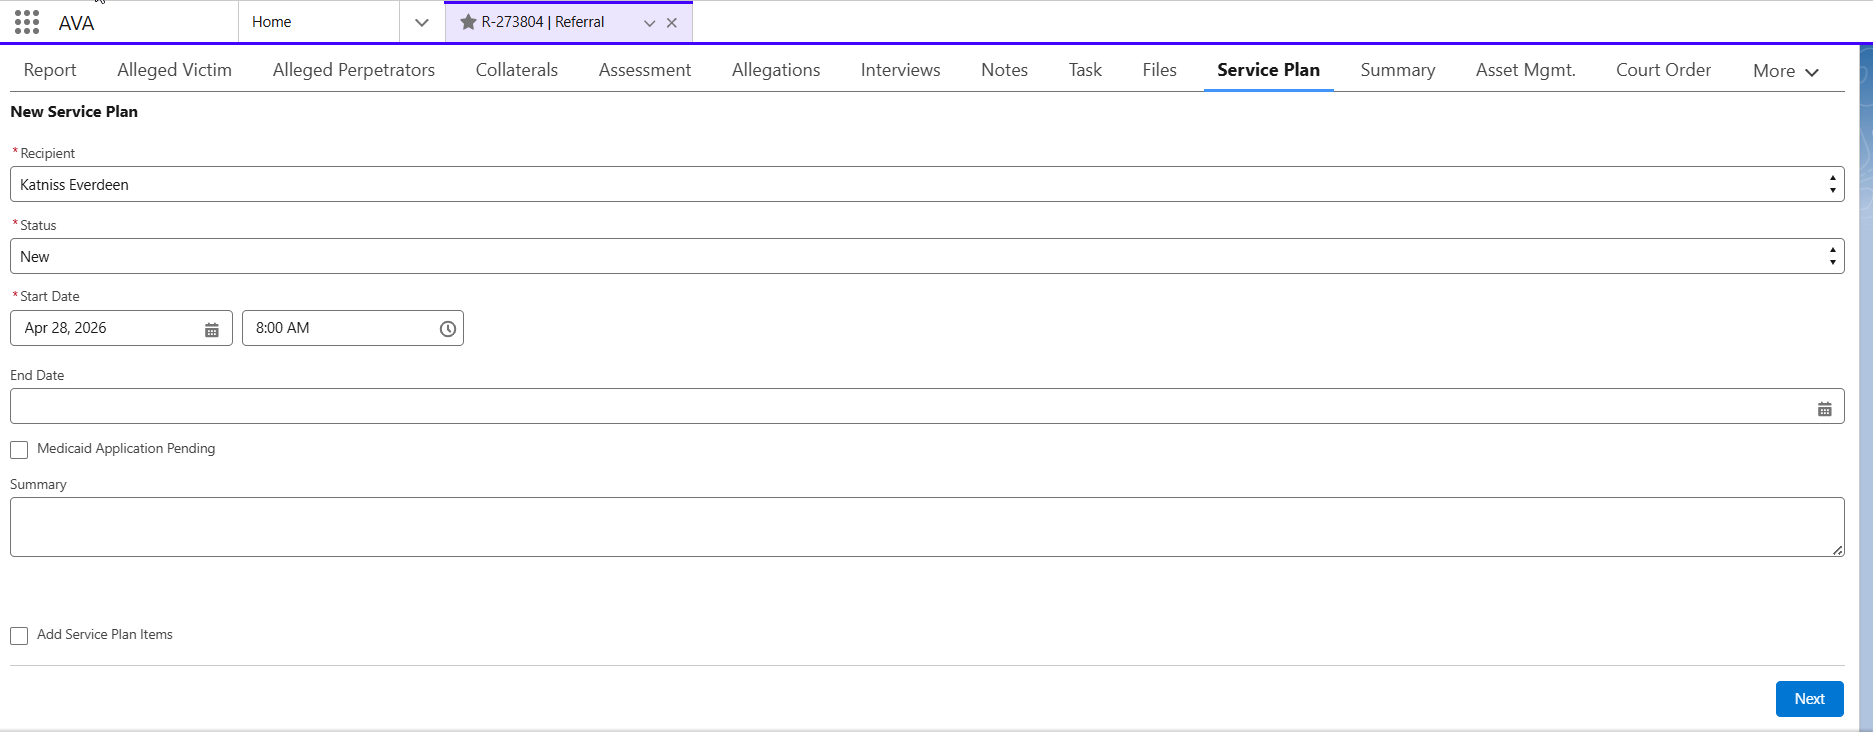
- Click on the Service Plan ID for the client.
- Click on Service Plan Items or click the inverted pyramid to the right then click New.
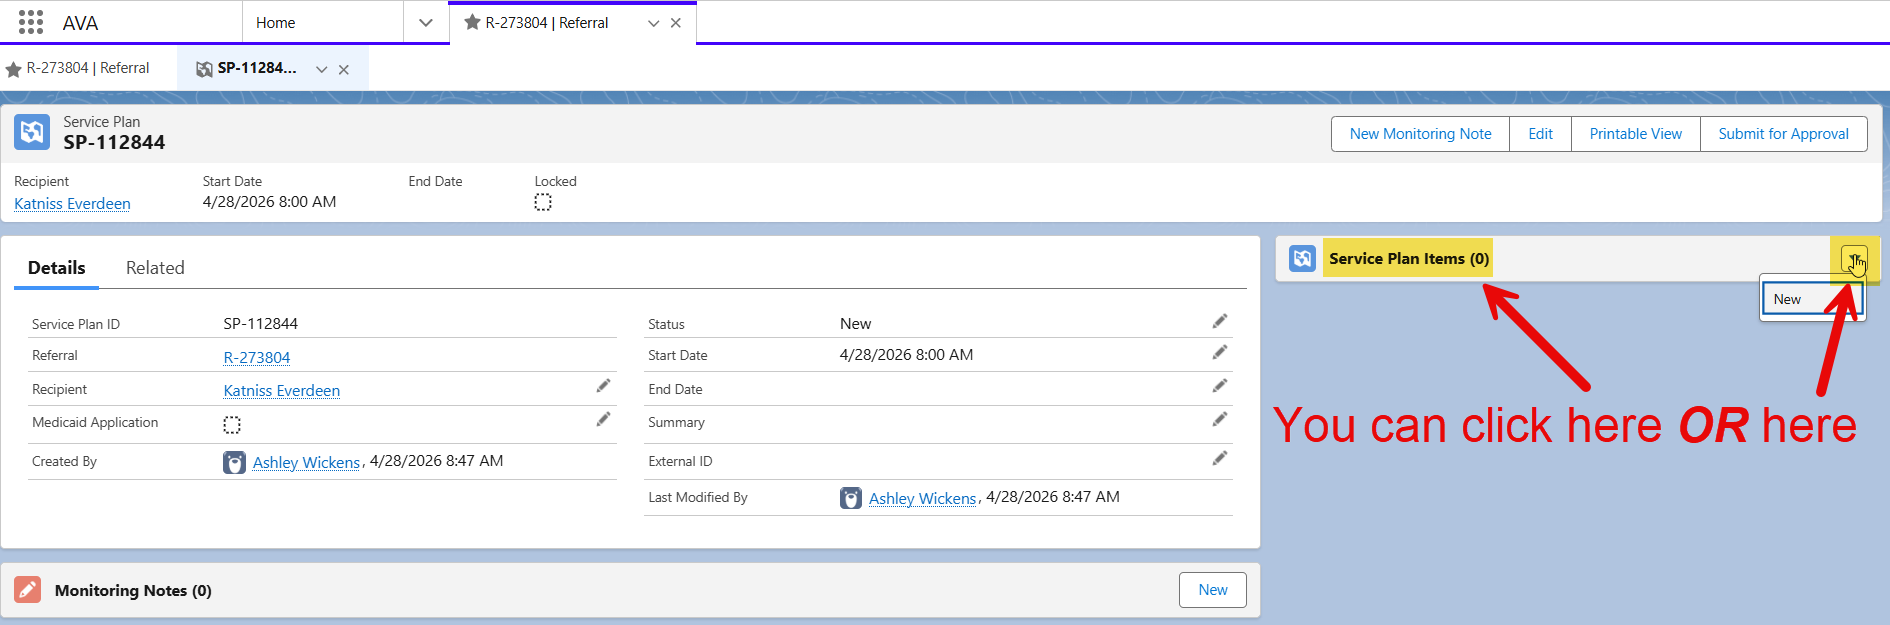
- If you clicked on Service Plan Items in step 5, now you will click on
New.
- If you clicked the inverted pyramid in step 5, this will be the screen you see. Fill in the Information section first. The Start Date will be the date you offered the service to the AV, the End Date can be left blank, check the Client Acceptance checkbox if the client accepted the service, select the Service Plan Type from the picklist field, the Emergency Funds and P-Card checkboxes will usually be left unchecked, select the appropriate Status [Existing Service, Offered – Accepted, Offered – Declined, Service Unavailable], fill in Details regarding the service, and select the Needs the service addresses from the Available column and move to the Chosen column. Next fill out the Provider Details section, including the Provider Name and Caregiver Notes fields when applicable. Lastly, click Save.
Tip: If you have more than one Service Plan Item to enter, you can clickSaveandNewand it will bring up a new page for you to enter your next Service Plan Item If you are finished entering items clickSave.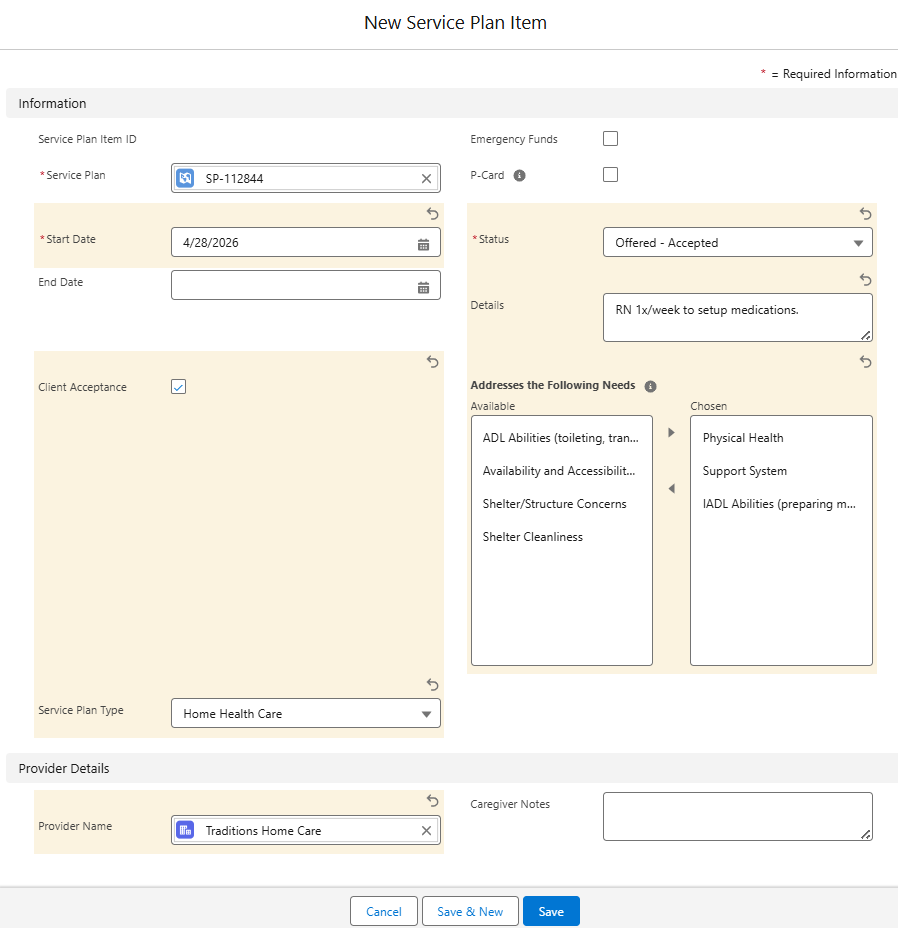
- You will see the Service Plan Item you just entered.
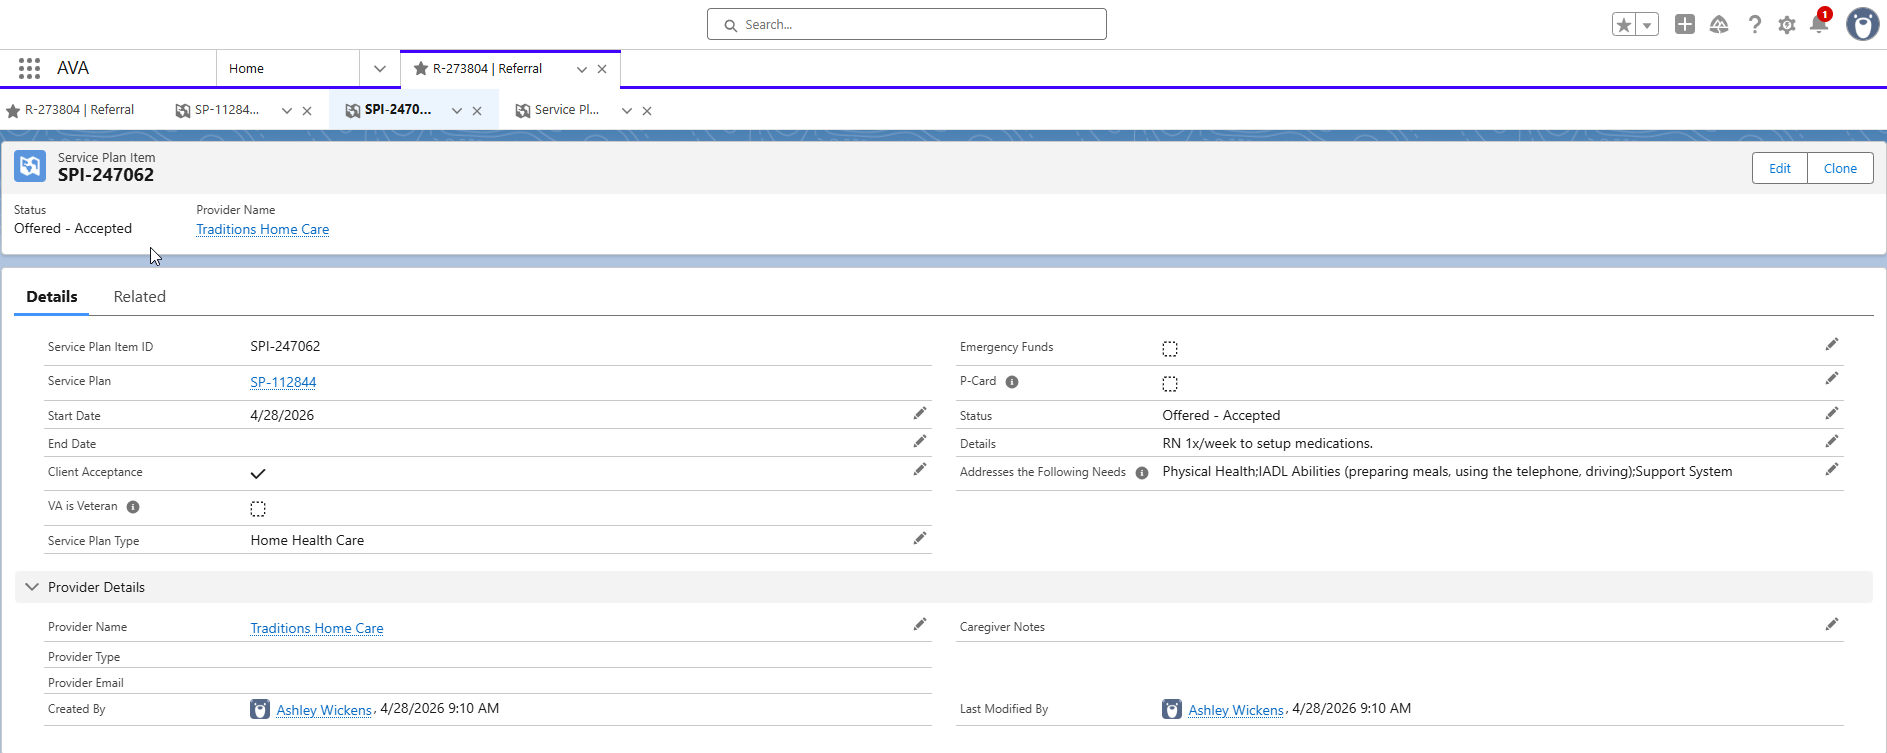
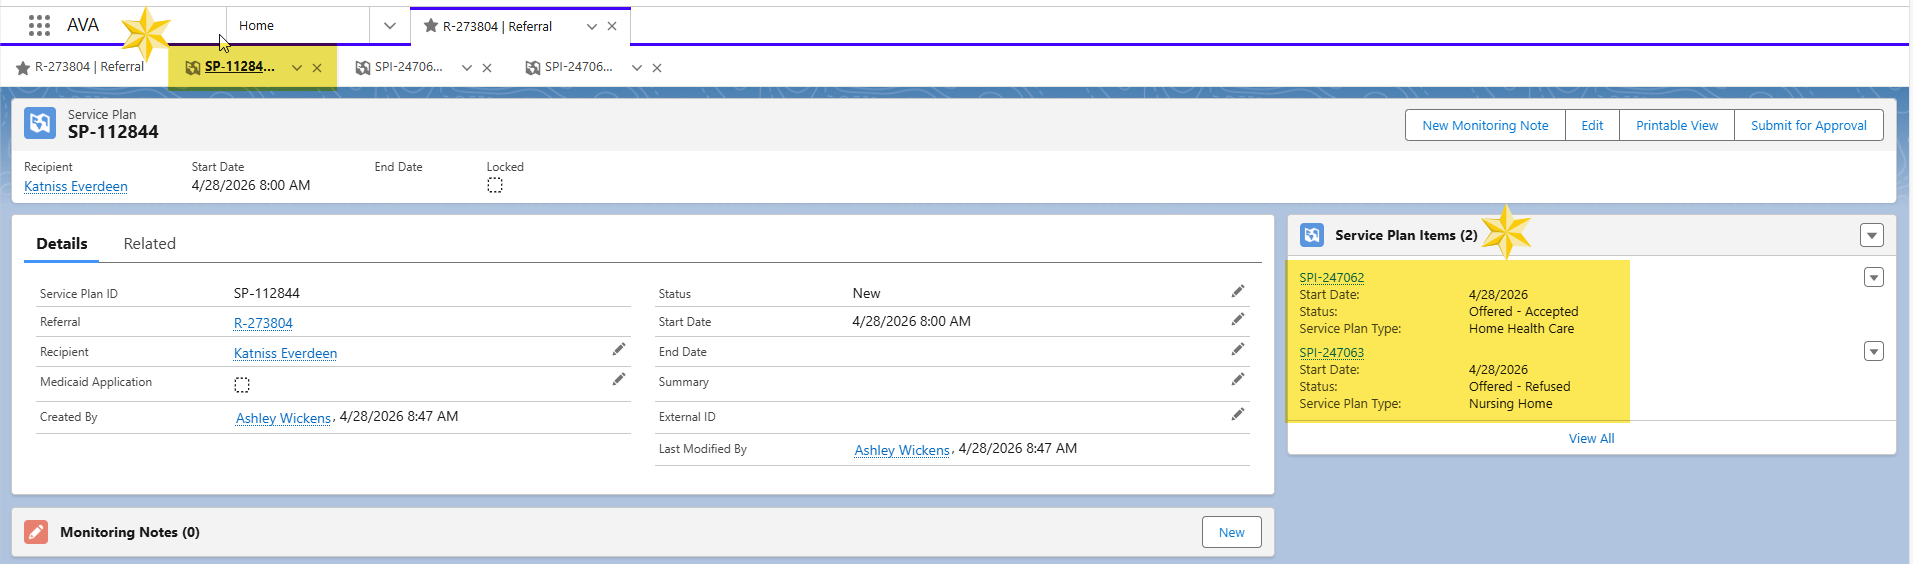
- Go back to the Service Plan and enter another Service Plan Item the same way until you have entered all of your Service Plan Items.
- If this is a Service Case, you will need to enter your capacity statement into the Monitoring Notes. Click
New. Capacity Statement Examples.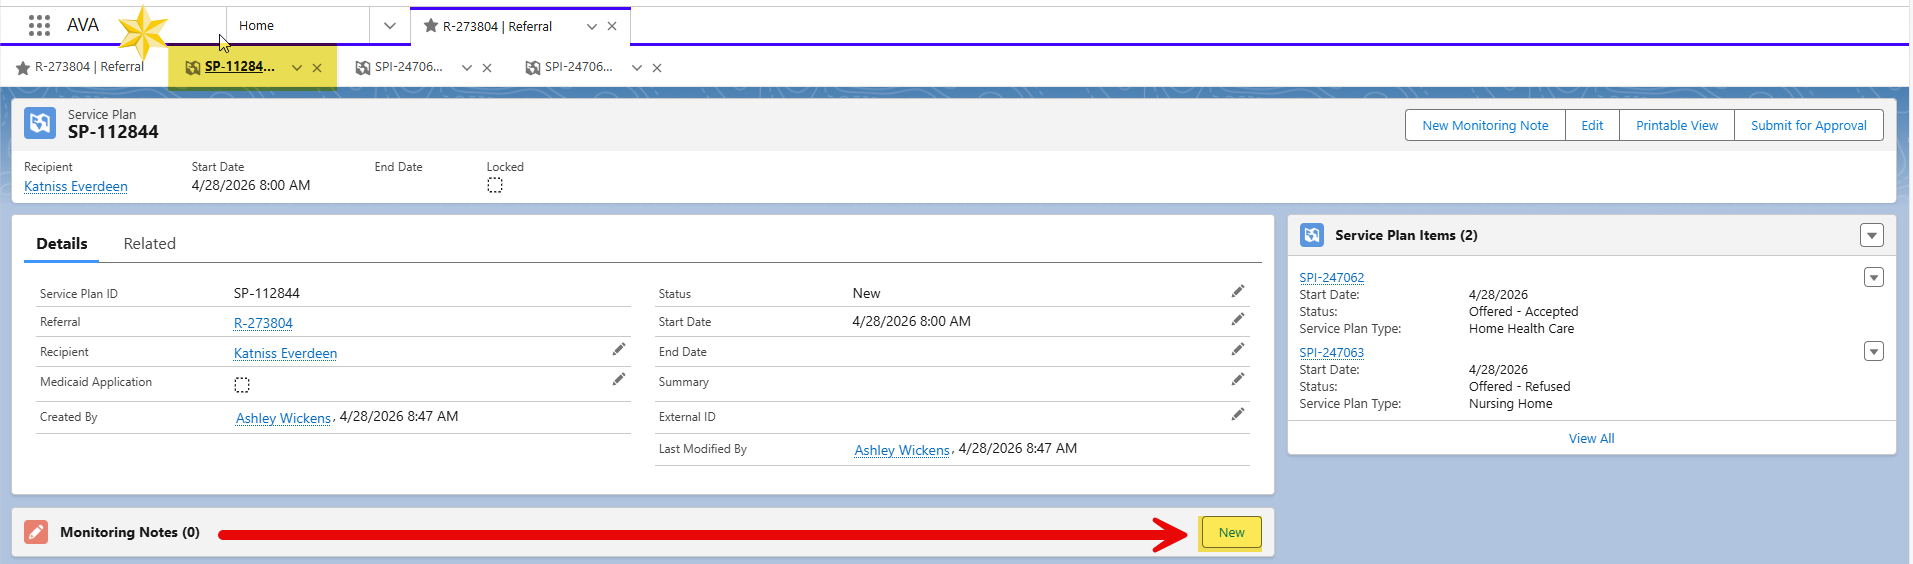
- Select
Notethen clickNext.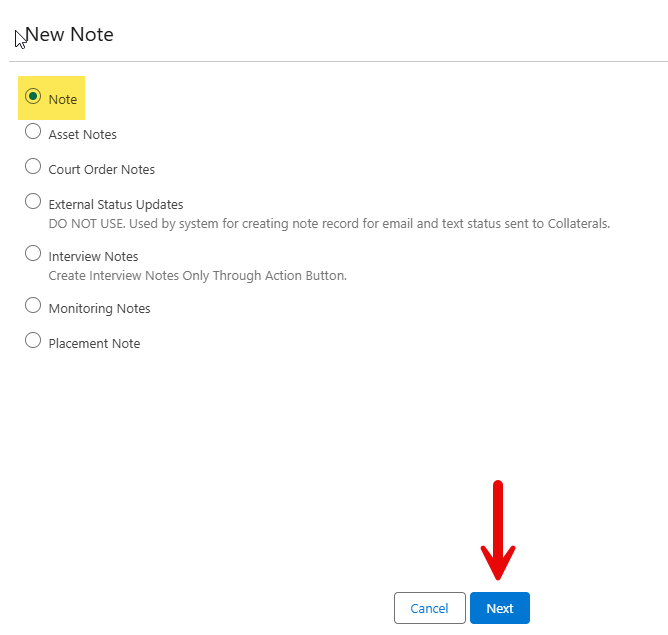
- The Type will be set to
General, enter your capacity statement then clickSave.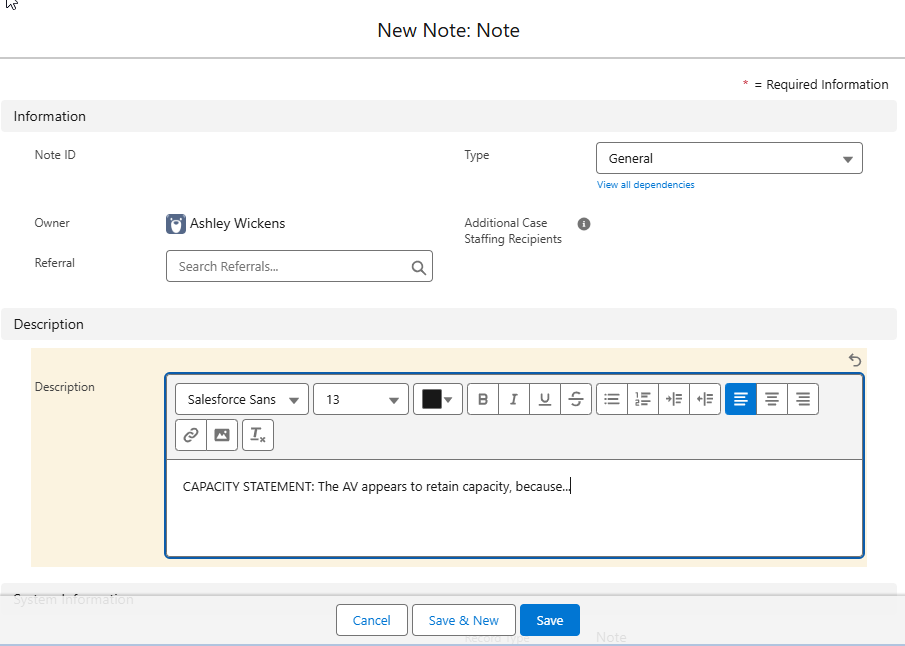
- Then you will see your note has been saved.
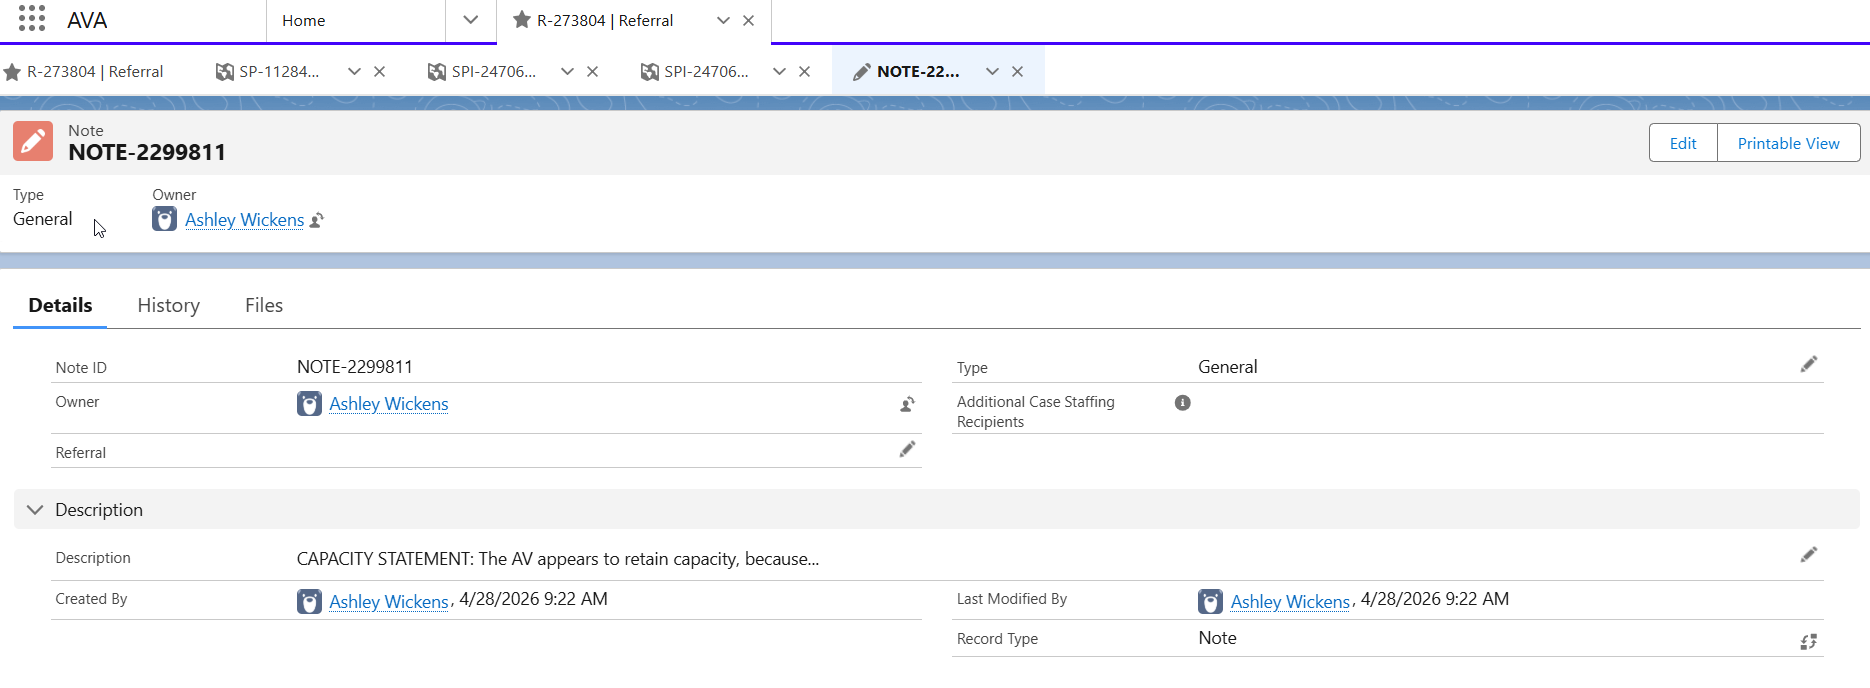
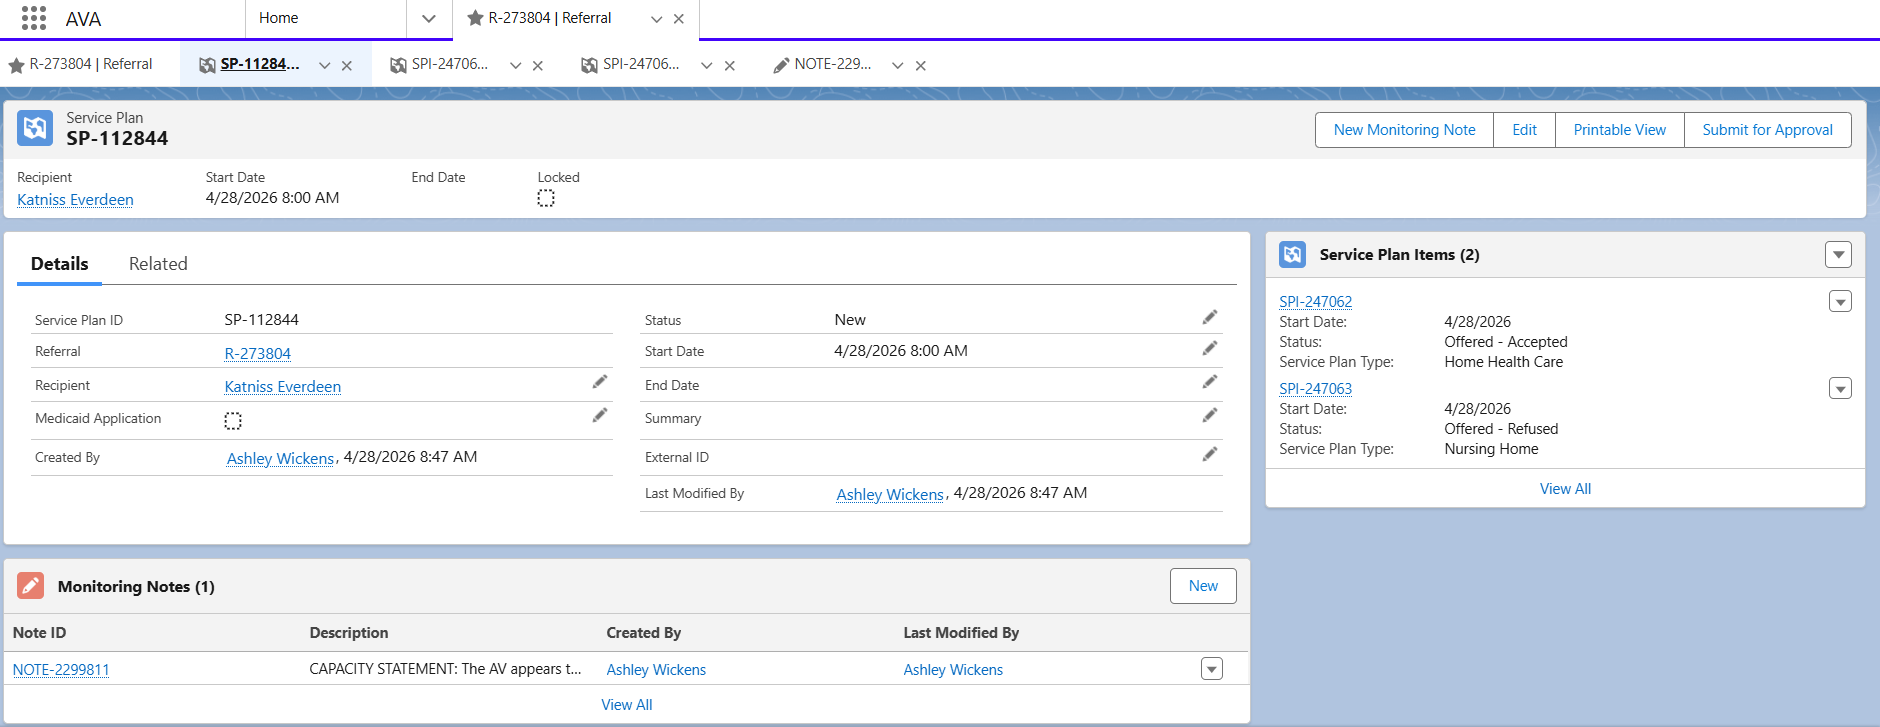
- When you go back to the Service Plan, you will now see the Cover Page, Service Plan Items, and if it is a Service Case, you will see your capacity statement.
How to Add Service Plan
See a mistake on this page?
